How to apply Thermal Paste?
When you change your CPU or GPU cooler, you have to apply your thermal paste, otherwise you will have problems with the cooling. How to apply thermal paste, we explain in this guide.
Applying Thermal Paste
There are many ways to apply thermal paste, which is why it can be a tricky subject for some enthusiasts. Everyone has their own way of getting the best results. But in our experience, there’s no real difference in all the methods heat-wise.
That’s why we recommend you the two simplest, most minimalist methods:
- The dot method
- The manual spreading method
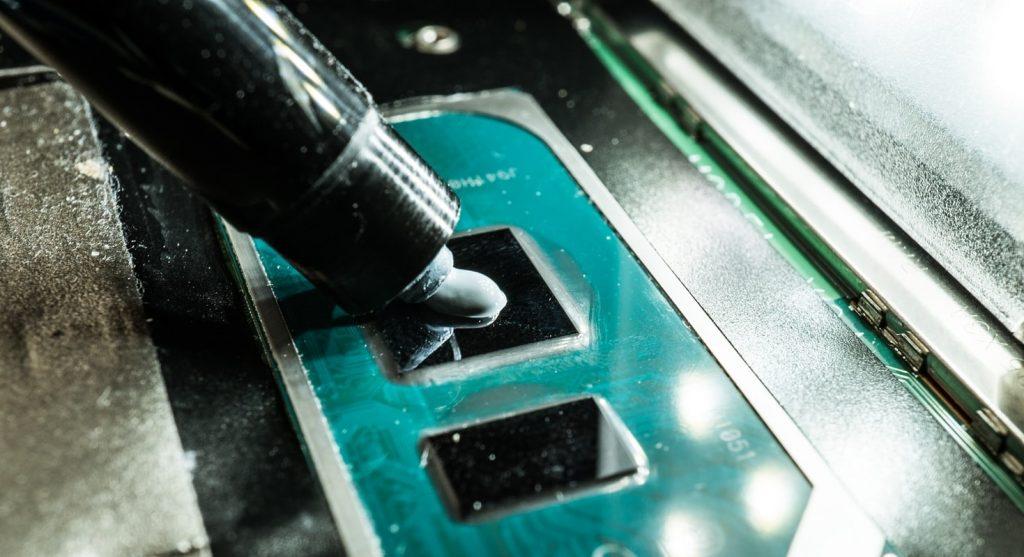
1. Apply a pea-sized Blob of Thermal Paste in the center of the CPU
In our opinion, the best method for a clean application of thermal paste is the dot method. As you can see in the picture, you put a pea-sized amount of thermal paste in the center of the CPU.
If you want to perfect the whole thing, you can now grab a small plastic spatula and spread the thermal paste evenly vertically and horizontally on the surface.
If you simply choose the blotting method, you don’t need to pay attention to anything else. A huge advantage of this method of applying thermal paste is the simplicity and safety of the process. Remember, the goal of thermal paste is to close microscopic gaps on the surface of your CPU and cooler.
However, you should leave a minimal gap between the CPU edge and the paste so that nothing overflows when you put the CPU cooler back on. This is only true if you have used too much paste.
This not only avoids an unnecessary mess. If you happen to use an electrically conductive paste, any contact with the PCB can cause a short circuit and damage the motherboard and other components.
The advantage of the manual spreading method is that it really covers 100% of the surface and gives you a clean conscience. However, this method is a bit more prone to errors and is more for advanced users.
2. Mount your CPU Cooler
Yes, that’s all you really need to do when applying thermal paste. Just make sure everything is in place before mounting your CPU cooler. If you place your cooler on the CPU and then realize you forgot a bracket or backplate, you’ll have to start over. Applying thermal paste is the last step before mounting the cooler.
Also, you should put your cooler on as straight as possible the first time. If you have to rotate it to align the holes after it’s already been placed, the thermal paste won’t spread properly.
This method will ensure an even distribution of the thermal paste. The blob from the previous step is enough to cover the entire surface without spilling out or forming too thick a layer.
Conclusion
That’s it. Knowing how to properly apply thermal paste can help you get the best performance out of your CPU. If you want to remove thermal paste, then read our next guide.
FAQs on applying Thermal Paste
Is it possible to apply too much Thermal Paste?
Yes, definitely. In this case, the paste can ooze out the sides and get on other components, which can affect the effectiveness of the CPU, GPU and entire system. However, too much is better than not enough, as long as the paste is not pushed out the side of the cooler.
Is it possible to apply too little Thermal Paste?
That is also possible. If you use too little thermal paste, your CPU or GPU may not be cooled properly. This can lead to system crashes or even damage to components. So stick to our recommendation from above. Check also our guide on normal temperatures for a CPU.